Showing posts with label Tutorial. Show all posts

Monday, November 28, 2011

More To Do With Cardboard: Quick & Simple Garland

I (once again... are we seeing a theme here?) found this beautiful garland on pinterest. However it was just a picture (but oh what a picture I wish it looked like that at my house) and had no instructions on how to make it, but I realized it would be very easy and made up my own! And here is how I did it (can I just say cardboard rocks!?!):
  • Star, Christmas Tree, & Heart Template (I just used ones off of Microsoft Word's clip art)
  • Cardboard
  • Scissors
  • Marker
  • Razor Cutting Tool
  • Hole Punch
  • Checkered Ribbon (I used red & white 3/4 inch ribbon)
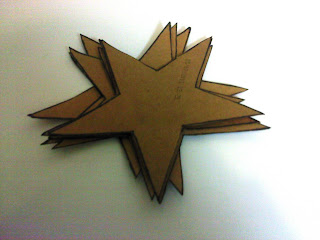
I started out finding the tree, star, and heart templates and then making them as big as I wanted them to be. After printing them off I cut them out and traced them onto cardboard (I used a leftover corn dog box). After tracing the shapes I used my razor to cut through the cardboard.

Once I cut out as many shapes as I wanted (I ended up with 16), I hole punched where I wanted each shape to have the ribbon go through.

{Ribbon was bought at Joann}
Then threaded the ribbon through each hole spread out as long as you want and hang up! *Hint: If you are looking to a fast way to thread the holes, make a pointed edge with you ribbon similar to this >.*
Inspiration:

My Results:
I loved how it turned out. I just taped it up in my kitchen since certain rooms in my house have horrible lighting (thanks to living in the Northwest and on a military base which equals old housing). Let me know what you think!

Saturday, November 26, 2011

You Made WHAT With Cardboard!?!

Along with adhering to my goal of being more crafty (and I make working on growing out my hair, just throwing that out there). As I may have mentioned (but to lazy to verify) I am not only trying to be crafty and do so on a very tight (ok non-existent) budget. Cardboard however is in great supply (thanks to drinking soda and baby diapers). Once again I took an idea and ran a completely different direction with it.

Here is the original & it had the deer template too!
So here is my latest project (made from a diaper box):

The No Animals Were Harmed In The Making: Deer Head!
Supplies Needed:
  • Cardboard (boxes work great!)
  • Sharp razor cutter thing (What are those things called anyways?)
  • Deer Template (From Chronicle Books Blog)
  • Tape
  • Scissors
  • Wire or something to hang it up with (I used the hooks for Christmas decorations)
It really was pretty easy to do just time consuming, hand hurting. I started out by printing out the template and taping the extra long parts together. I cut wide and taped the template on my cardboard.

I proceeded to carefully cut along the lines and cut out all the pieces.

Then it is pretty self explanatory. Add each piece where it goes and you have the finished head.

Then all I did was take a pin and pin a couple holes and feed the hook through and bend to make a hanger.

Lastly I decorated it for Christmas. :)

My hunting hubby grudgingly likes it (since he hasn't gotten to hunt this year or last). I love these types of projects because there are about a million ways to do your own! Hope you all enjoy! I had a blast doing it (more then I probably should of). Don't forget to enter my giveaway it ends only in a couple days! Also remember 100 followers and I will be giving away to $25.00 gift card to Applebee's.

Saturday, November 19, 2011

My Crafty Goal & Stars

I have set a goal for myself to find a way to be crafty once a week. I am by no means a crafty-type. In fact I am a very logical, play with numbers-type. However I love working with my hands (hence my love of writing and blogging). Therefore I decided it was high time I start being more "artist" and to add good measure to use things I have laying around the house.
Confession 1: We drink a lot of soda in our house so I had soda boxes a-plenty! (Came in really handy for this craft.)
Confession 2: I didn't come up with this idea, though I changed it completely and then ran with it. Here is what inspired me:

Confession 3: I am completely proud of myself for how well it turned out and thinking of the changes.
So here are the instructions for my version of the craft pictured above.

What you will need:
  • Scissors
  • Mod Podge
  • Marker
  • Star Template (I just used the one on Microsoft Word & enlarged it)
  • Cardboard
  • Newspaper
  • Glitter
  • Hole punch
  • String or thread
How To: Print and cut out star template. Trace star onto cardboard, repeat as many times as you desire.


Cut out stars from cardboard. Mod Podge newspaper onto each side of star.


Cut out excess amount of newspaper. Allow to dry and repeat on other side of star.

After allowing both sides to dry, apply more Mod Podge to outside and apply glitter liberally on one side. Allow to dry and repeat on other side.

Hole punch each star. String each star through hole and tie knot at the far end. Hang up stars from ceiling.
Easy enough but it took me hours to get all the stars done but here is the end result in Little Miss' room above her changing table/dresser. I love it!